Table of Contents
Openvario Setup Guide
General
This should guide you through the first setup of your Openvario. You need an USB keyboard, a µSD card with at least 8GB, and a USB thumb drive. Save yourself (and us) a lot of headaches and use a good quality µSD card, and thumb drive. As examples, Samsung Evo+ µSD card and Sandisk Ultra Fit are a good choice.
Prepare your µSD card
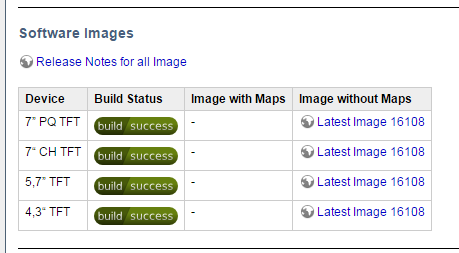
Download latest image for your Openvario variant from our Download Page and unzip the downloaded file
On Linux
Just unzip the image and copy it to your µSD card
gunzip <image_name>


dd if=<image_name> of=<sdcardreader_device>
On Windows
Install Win32 Disk Imager from https://sourceforge.net/projects/win32diskimager/
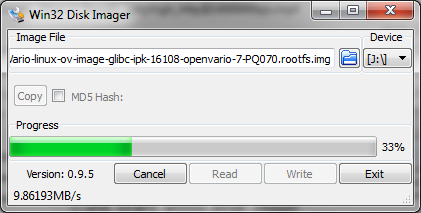 Remove all removable media from your computer (just a small safety net…), then put your µSD card into your cardreader and start Win32 Disk Imager. Select the downloaded image file and the device that is your µSD card. Check, double check and triple check that the correct device is selected. Anything stored on the target will be deleted without any chance of recovery! At the end of the process you should see a “Write Successful” message.
 Insert the µSD card in your openvario and apply power. After a few seconds you should see the Openvario logo, followed by two penguins. When you see “Starting XCSoar…, press [ESC] for menu” do nothing and wait.
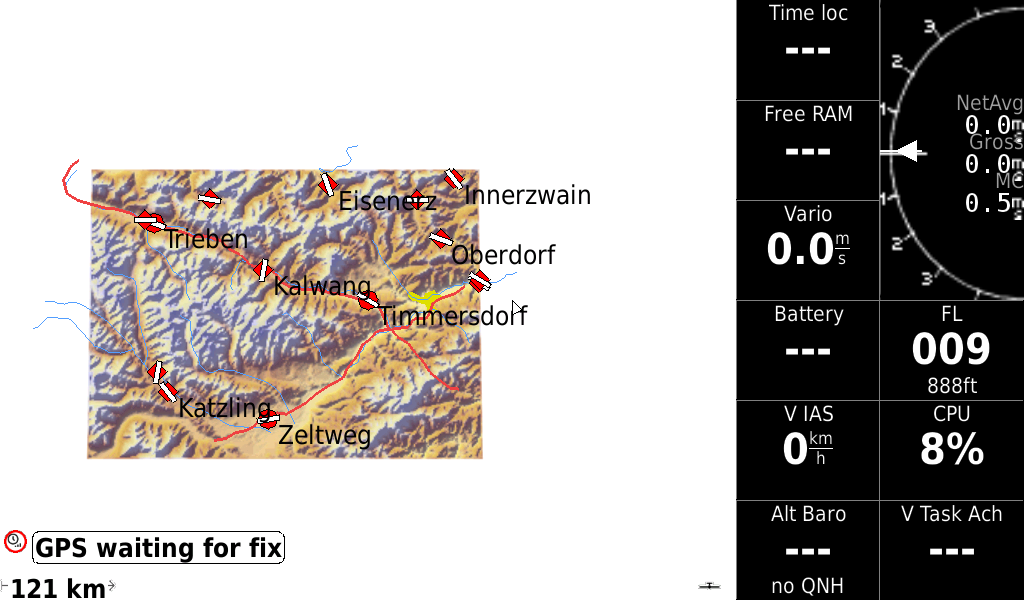 Your Openvario should boot directly to XCSoar and show a small map and some infoboxes on the screen. Success! If booting fails, you should perform electrical tests
Configure your Openvario
Now we are going to configure your Openvario.
Connect an USB keyboard and quit XCSoar (press F1 for Quickmenu and select “Quit”).
 When you see the “Starting XCSoar…, press [ESC] for menu” press ESC to go to OVmenu (MAIN-MENU).
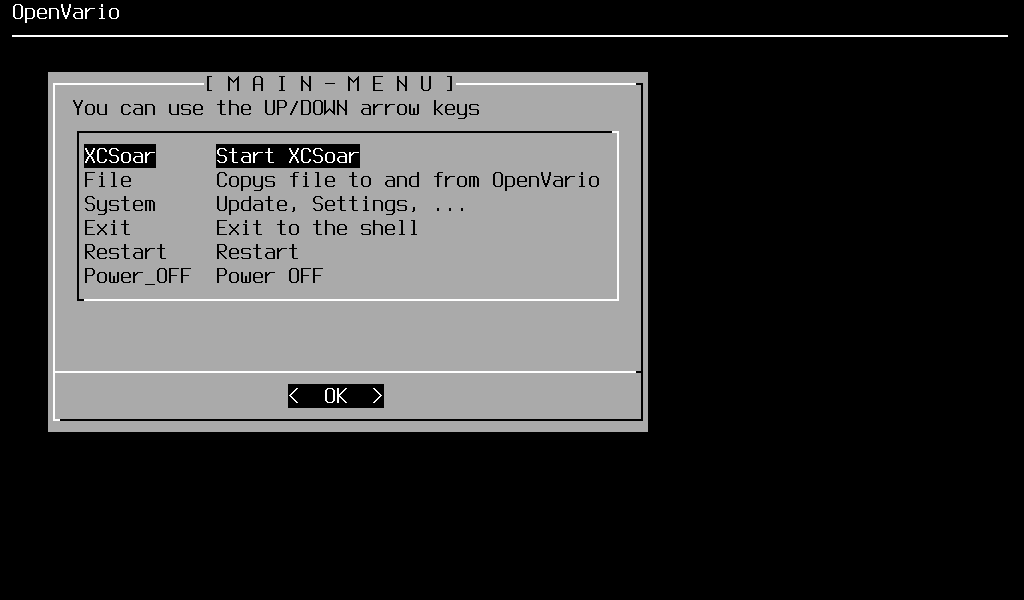 This is what the OVmenu looks like
Calibrate sensors:
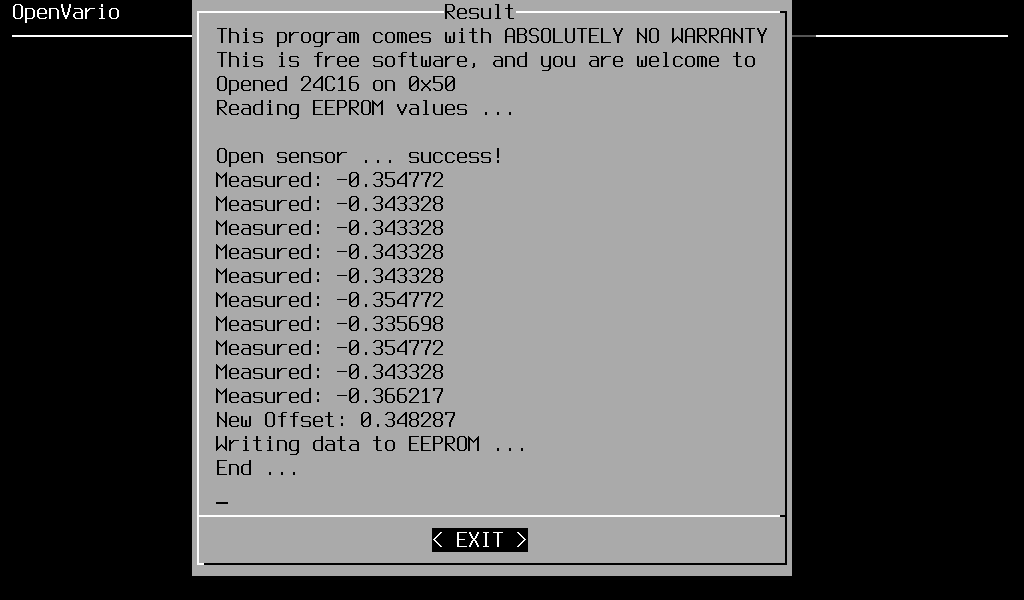 Make sure all the pressure ports are at ambient pressure and select System → Calibrate_Sensors, select Yes and wait for the results screen
Set XCSoar language:
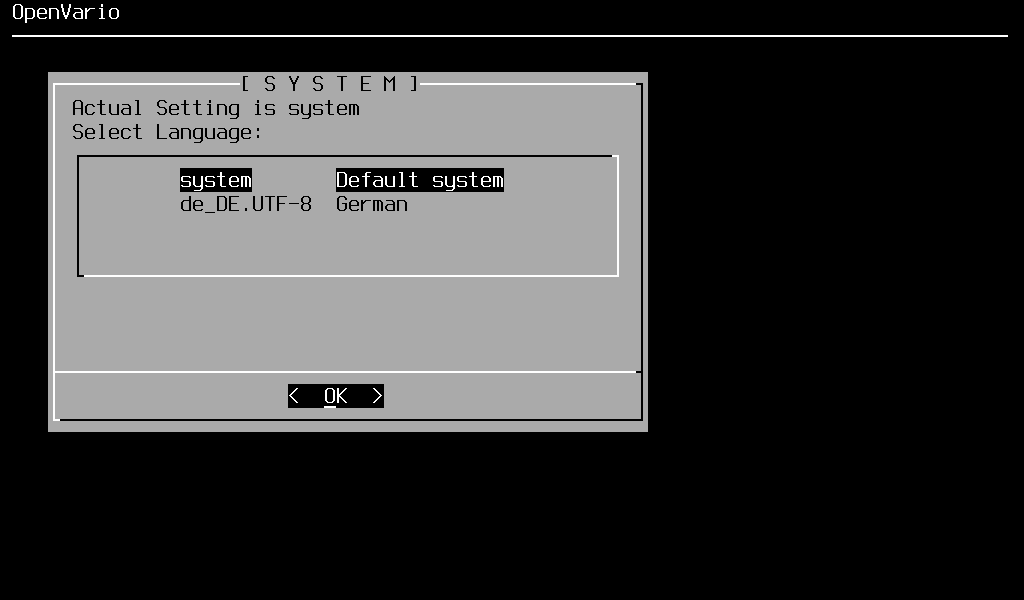 Select System → Settings → XCSoar_Language and set your preferred language. More languages yet to come
 ![]()
Calibrate touch:
Select System → Calibrate_Touch and touch the crosshairs shown on the screen (three in total). You must now set rotation to make the change permanent!
Sorry, no pic for this one ![]()
Set rotation:
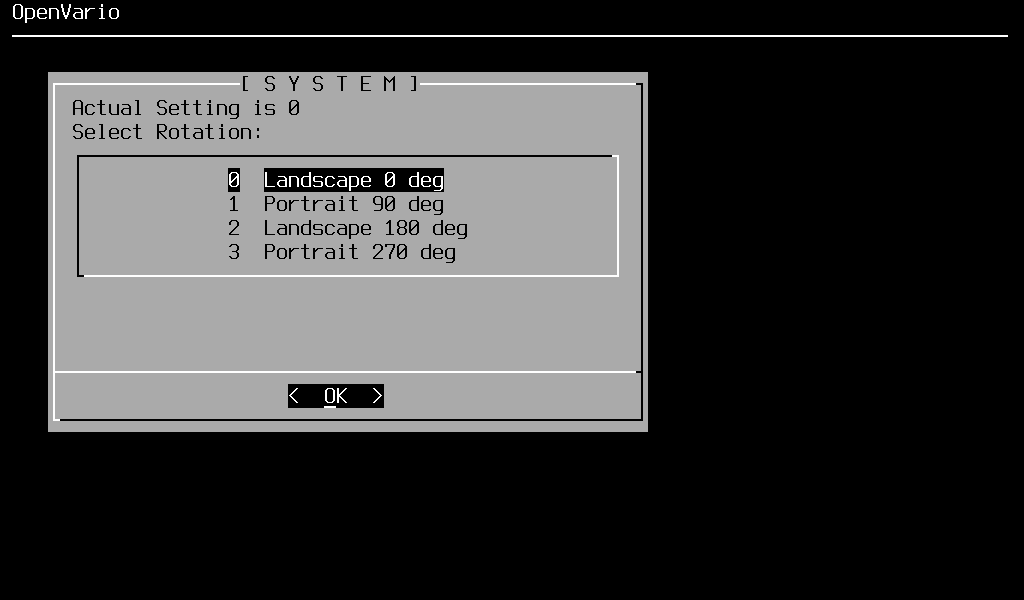 Select System → Settings → Display_Rotation and select your preferred rotation. Reboot your Openvario.Note that this is the only rotation setting that is required, any setting in your XCSoar profile files is ignored!
Select Restart to reboot your Openvario
Transfer data to your Openvario
Your Openvario is a small computer with Linux operating system, so there are many ways to transfer data. The easiest one is probably using a USB thumb drive. Your thumb drive should be FAT32 formatted with one partition. Most - but not all - drives you buy (and have not tampered with) should be exactly like that.
Prepare your USB thumb drive and create the following directories
/openvario
/openvario/igc
/openvario/upload
/openvario/upload/xcsoar
While you are at it, you can also create these for later use
/openvario/images
/openvario/maps
/openvario/repo
It should now look like this

Copy all data you would like to have in your XCSoar directory (/home/root/.xcsoar by the way) to /openvario/upload/xcsoar (used to be /openvario/upload in older images) on your USB thumb drive
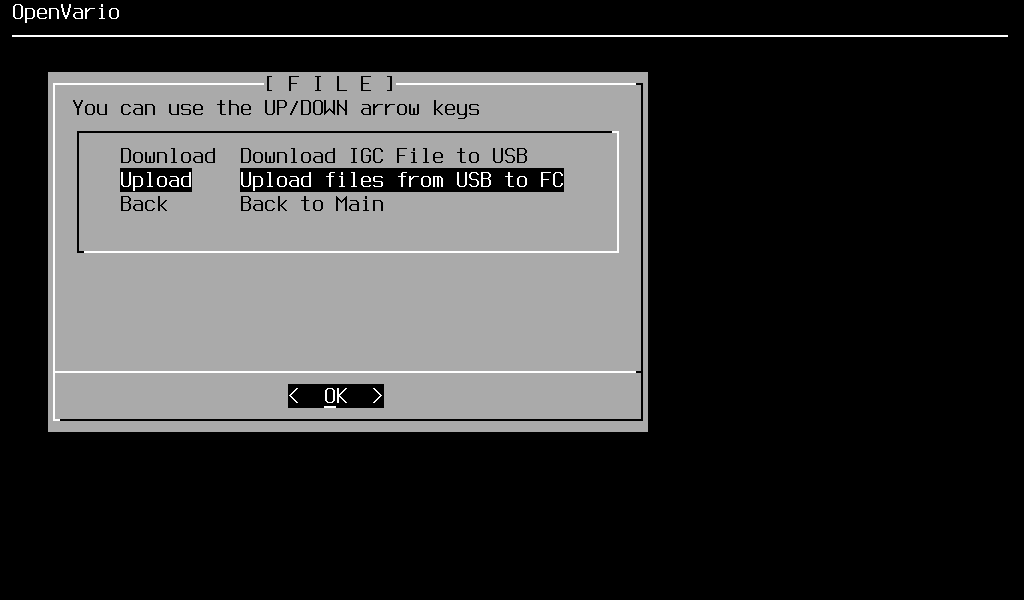 Connect the drive to your Openvario (avoid using a USB hub between thumb drive and Openvario), go to OVmenu and select File → Upload. The files are now copied to your XCSoar directory.
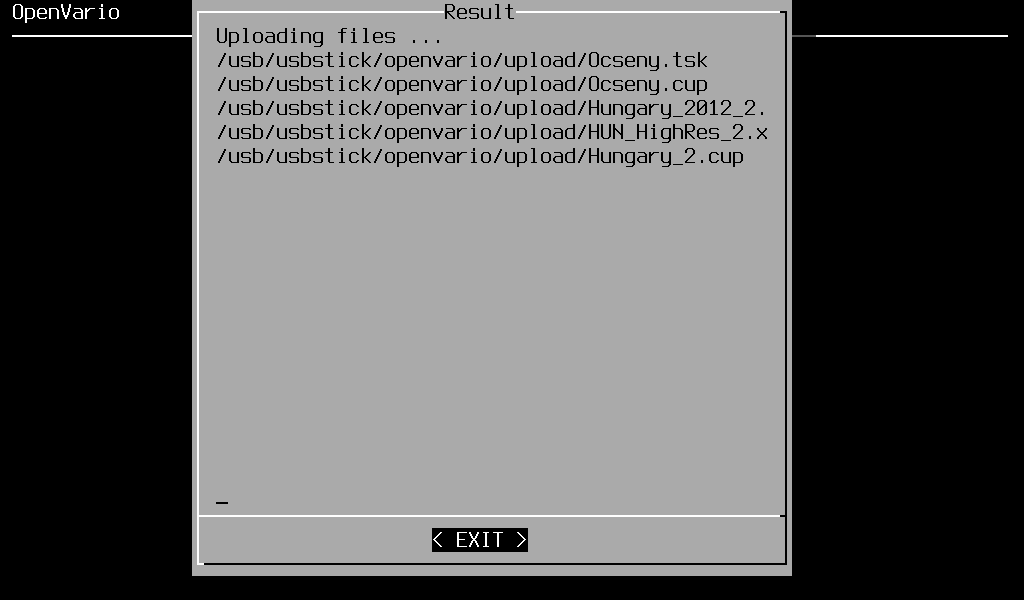 For large files like maps upload may take some time, depending on the speed of your µSD card and your USB thumb drive.
Start XCSoar and customize it to your liking
Connect Devices
There´s a saying “garbage in, garbage out”. In our case this means that if you want to get useful data out of XCSoar, you need to feed your flight data in somewhere. This data is provided by devices..
Sensorboard
Device A is already pre-configured with the Openvario driver at TCP port 4352. This is where sensord/variod provide barometric pressure, dynamic pressure and vario data to XCSoar. Unless you know what you are doing there should be no need to change that.
FLARM, IGC Loggers, etc.
If your device has an IGC compatible socket connecting it to your Openvario is really simple. Get a (straight, not crossover) LAN patch cable, plug one end into your device and the other end into one of the RJ45 sockets at the backside of your Openvario. Use ttyS1, ttyS2 or ttyS3 and do NOT use ttyS0 (this is the Linux serial console port which is kind of special. Should you really run out of serial ports it can be used after a small software change)
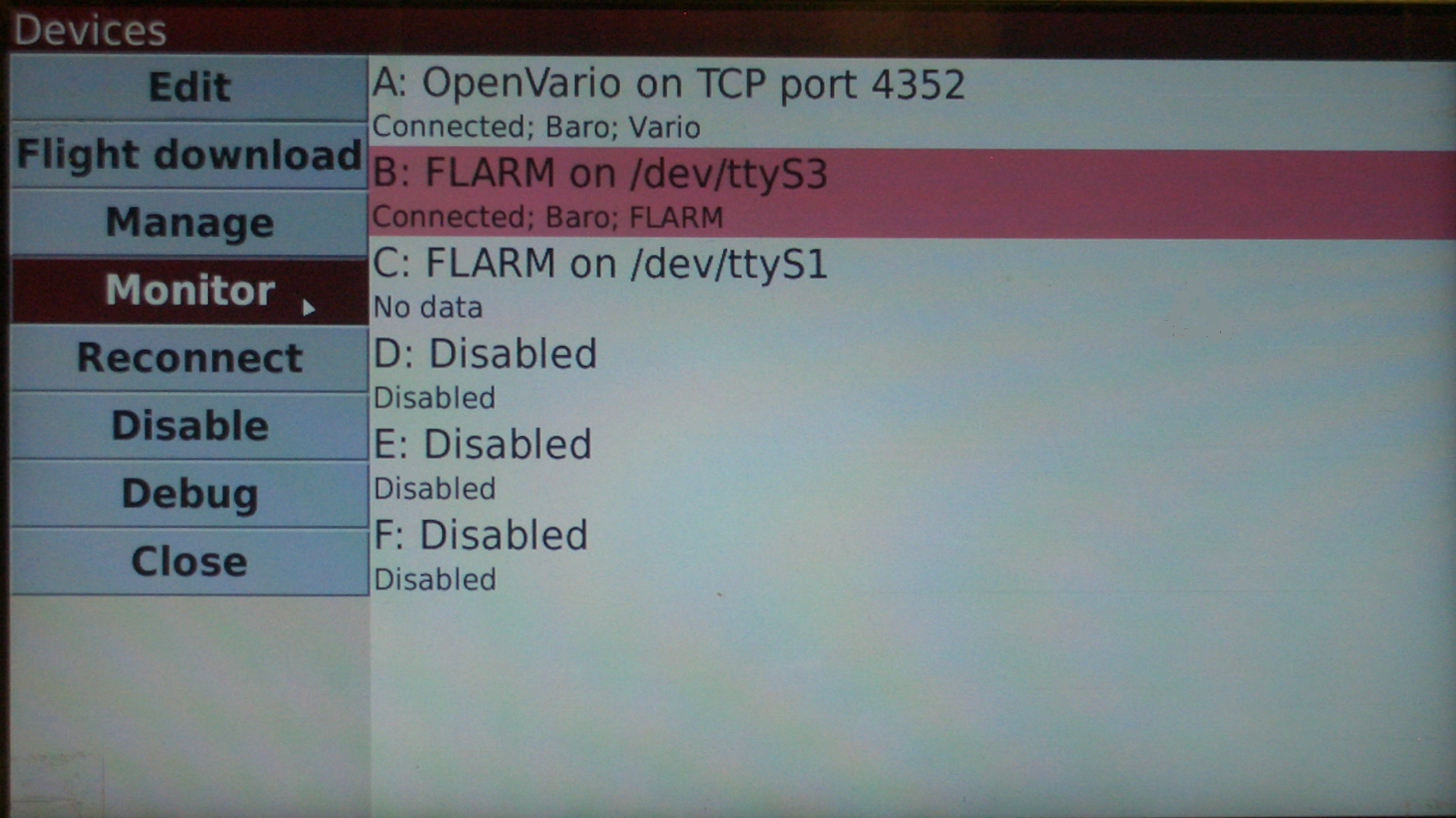
 Select your device in device manager, select the correct port and baud rate and that´s it.
Hint: if you select “Monitor” and see a lot of garbage data your baud rate is probably wrong. If you see nothing you have probably selected the wrong port.
WARNING! If your device device has a RJ45 socket with a NOT IGC compatible pinout you´re on your own. Connecting it to your Openvario might damage your device, your Openvario, or both. Send a message to the vendor of your device and ask them to comply with the IGC standard pinout, or better yet don´t even buy it or send it back for a full refund.
Download flights from your Openvario
Download flight logs from your device to Openvario
Download flights from your logger in the XCSoar Devices menu. When finished, your igc file is stored on your µSD card in a subfolder of your XCSoar data directory (/home/root/.xcsoar/logs).
Download flight logs from your Openvario
Again, there are many ways to transfer files from your Openvario to somewhere else. The easiest way to download igc files is using the USB thumb drive already prepared. Go to OVmenu and select File → Download. All igc files in the XCSoar data directory (/home/root/.xcsoar/logs) are now copied to directory /openvario/igc on your USB thumb drive.
 Except where otherwise noted, content on this wiki is licensed under the following license: CC Attribution-Share Alike 4.0 International