Table of Contents
Soldering
With the Eagle / KiCAD files for adapterboard and RJ45 connectorboard and schematics and Gerber files for the sensorboard provided order your PCBs from the PCB service provider of your choice. There is a large selection with different prices, lot sizes and lead times - pick what suits you best or have a look at the Builders Blackboard.
Adapterboard
The adapterboard is next. Solder RS232 level converters with some supporting capacitors, A/D converter with cap and voltage divider resistors and the large reverse voltage protection diode to the bottom side of the PCB. Please keep in mind, that your adapterboard may look slightly different if you are using another display variant or a newer board layout.

On the top side of the PCB start with the 30pin FPC connector (0.5mm pitch). If you managed to solder this part without short circuits, burnt part or not connected legs the rest of the PCB should be a piece of cake. Continue with the rest of the SMD parts and finish with all connectors, DC/DC converter and 3.3V voltage regulator. Before you proceed, adjust the DC/DC converter to 5V output and check the 3.3V supply.
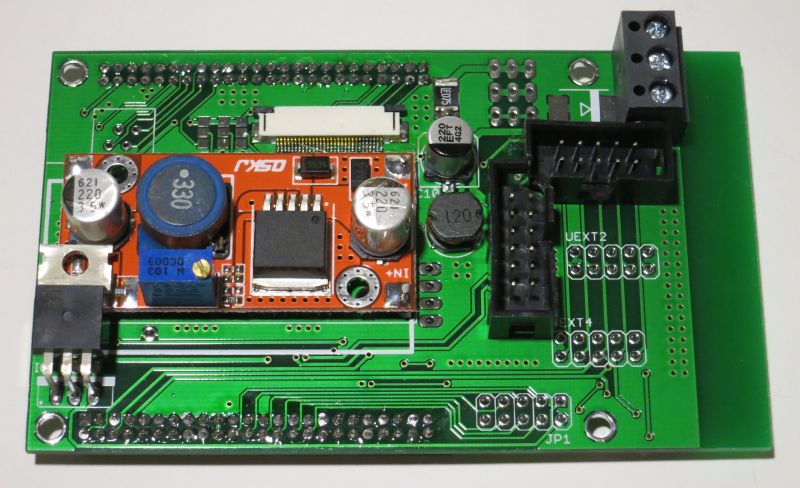 If you are done with soldering the Adapterboard, you can continue with Electrical Testing Adapterboard.
RJ45 board
The RJ45 board is pretty straight forward. Solder the four fuses (the only SMD parts here) on the bottom side, install quad-RJ45 socket and 12pin connector and you are done.
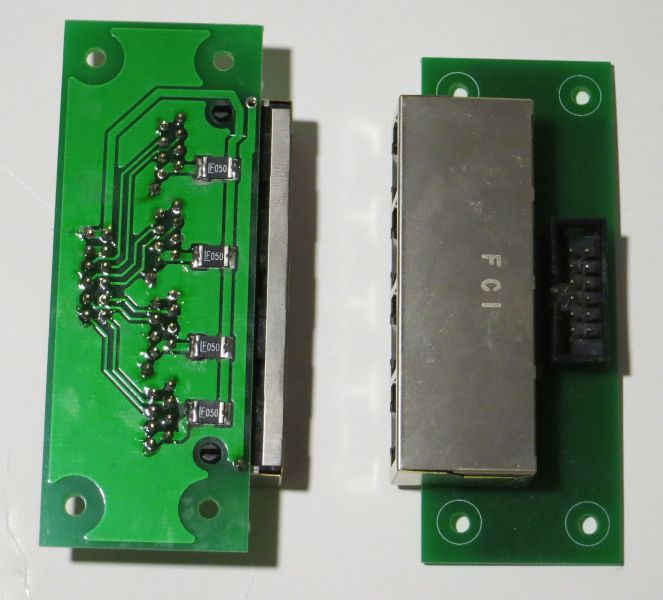
After connecting it to the Adapterboard via the 12-pin ribbon cable, you can check the correct function here: Electrical Testing RJ 45-Board.
Sensorboard
The sensorboard can be soldered by hand, but for best results a reflow oven is recommended. Start with SMD parts on the top side, then hand solder through hole parts and five SMD components on the bottom of the PCB.


Clean and carefully inspect all PCBs for short circuits, bad solder joints and other defects using a good light source and magnifiers. Be careful when cleaning the pressure sensors MS5611, they have a little breathing hole which should not be contamined with cleaning detergent. Before mounting the POM-Block, check all boards for correct function by means of electrical testing.
Back to Build
 Except where otherwise noted, content on this wiki is licensed under the following license: CC Attribution-Share Alike 4.0 International